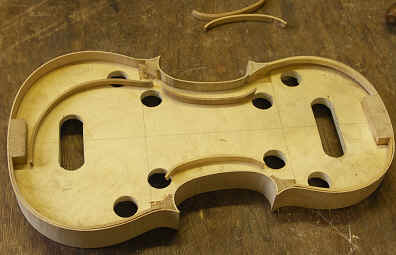
The ribs are bent
from flat strips of maple. The end and corner blocks are lightly glued
to the mould. The ribs are bent to shape on a hot iron and glued to the
blocks, starting with the waist. When the ribs are all in place, the
linings, made of willow like the blocks, are fitted. The original had
an unusual way of fitting the linings against the blocks. They are
notched into the block from the bout side rather than set into a
channel from the waist side.
Clicking on most images will launch
a larger version.


All photos on this page: George
Stoppani.
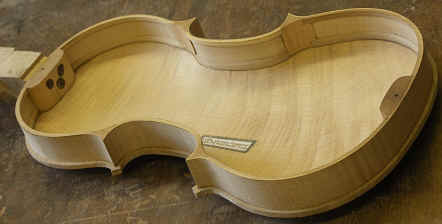
The back and front
were carved from chunks of maple and spruce respectively. They were
roughed out first and allowed to settle before flattening the underside
and completing the shaping. The bass bar is fitted after the f-holes
have been cut and the graduation complete. A little extra wood is left
round the outline, which is only finalised after the belly has been
glued to the ribs.
 
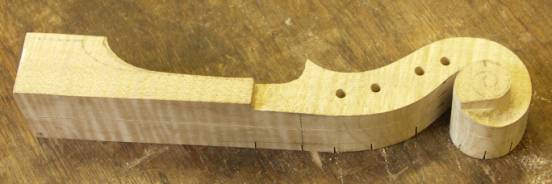
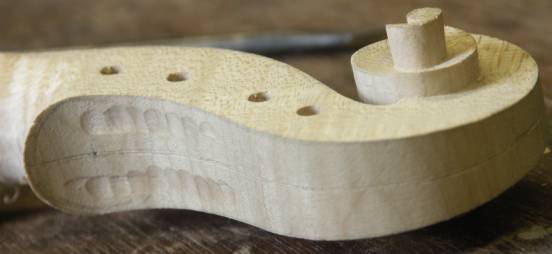
The neck and scroll
are carved in stages. First the profile is sawn and smoothed. Next, saw
kerfs are made to facilitate removing wood from the peg-box cheeks and
the volutes. When this is complete the flutes are sunk round the back
of the peg-box and round the head and the peg-box can be hollowed out.


When the neck and
scroll are finished the ribs are removed from the mould and the neck
glued and nailed in place, after which the back can be glued to the
ribs, also with an allowance to be trimmed later.
 
The neck was
not
shaped yet, to assist in holding a vice. The belly was then glued on,
and the purfling (made of pear wood dyed black and poplar for the white
strip) was inlaid. The fingerboard was made and fitted and then it was
strung up to see if there were any problems.


All was OK … the
edges were shaped and the neck smoothed. Varnishing was the next step.
A ground layer, made up of very fine mineral particles in a pine resin
and linseed oil varnish, was applied, followed by a few very thin coats
of the same varnish but with added resin dyed with madder. The
temporary pegs were replaced with the final ones, and adjustments to
bridge and soundpost made the violins ready to show to Oliver and
Catherine. Needless to say, the strings were “Real Guts”.
Equal tension
was the only option, which put the g string at a diameter just over
2mm. Before I delivered them, I went back to the RNCM to see how the
copies looked and sounded compared to the original.
The legendary
yellowish colour of the Amatis can be very difficult to emulate, and I
had been concerned that I had not managed to get the colour anything
like the original. When laid side by side the colour was much nearer
than I had thought. Also, in spite of the radically different set-ups,
my copies clearly had some tonal features in common with the original
which, in spite of being over 400 years old, has a brilliant, immediate
sound. There is much myth about Amati tone. They are often said to be
gentle in tone and only suitable for chamber music. This is absolutely
not true. I believe that they were originally very powerful with depth
on the g string and a piercing but clear and beautiful e string, the
middle range having interesting colours.


I took the new
violins to London for a road test session with Oliver and Catherine.
After some minor adjustments, we all felt that they were ready for the
first concert. I was able to go to this concert: the Monteverdi Vespers with the
Gabrieli Consort & Players at Christ Church,
Spitalfields. Of course, all the efforts towards historical accuracy in
the instruments would count for nothing without musicians of a high
calibre and a serious commitment to understanding the performance
practices of the time. I was not disappointed. Paul McCreesh has
devoted his career to this end and has sought to work with musicians
who share his passion. I find no work more satisfying than this type of
collaboration.
All images on this page are by
George Stoppani
|